How to iron perler beads
Ironing fuse beads melts the centers so they bond into one piece. You will need your finished pegboard, ironing paper, and a dry iron. Start from a printed pattern PDF so bead counts match what is on the board.
Before you heat the iron
- Place every bead on the pegboard per your grid (use crafting mode to track).
- Clear a flat, heat-safe surface with ventilation.
- Preheat the iron to medium—no steam.
- Read the leaflet in your bead box; Perler.com publishes official ironing guidance for their product line.
Ironing steps
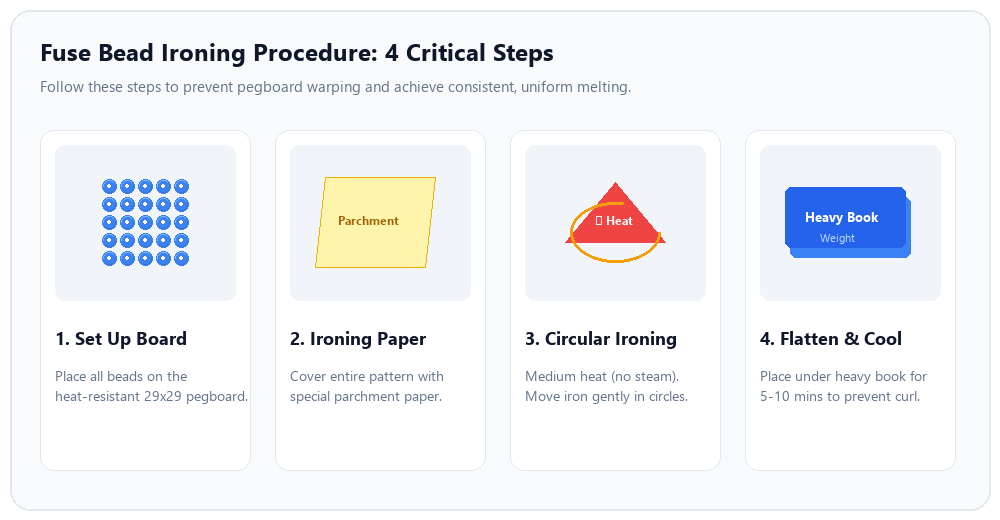
Step-by-step visual workflow: always use parchment paper and circular motion to protect your pegboards.
- Lay ironing paper over the design. Move the iron in slow circles for 10–30 seconds until holes look closed.
- Lift the paper carefully; let the board cool enough to handle.
- For flat coasters or keychains, flip and fuse the reverse side with another sheet of paper.
- Weight the piece under a book for a few minutes if it curls.
Standard melt vs full flat melt
Crafters usually choose between two primary finishing aesthetics depending on the project type:
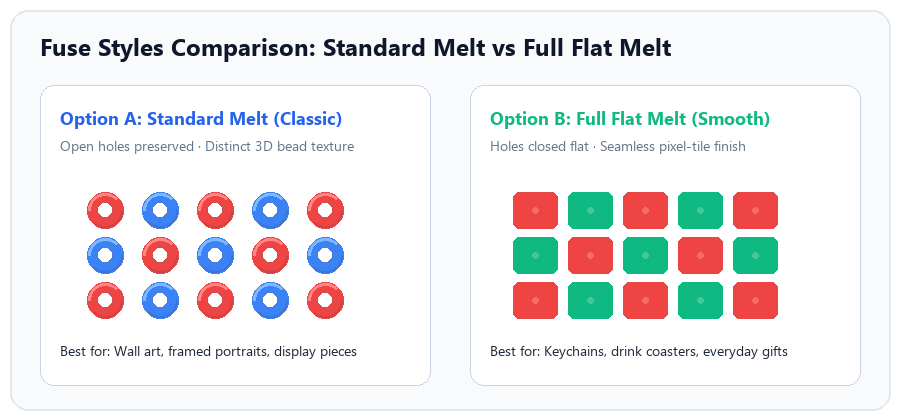
Comparison: Standard melt retains dimensional beads for framed art; full flat melt seals holes for durable keychains and coasters.
Multi-board projects
Large photo patterns span several 29×29 boards. Iron and release one section at a time. Slight color shifts at seams are normal—touch up bead edges before the final fuse pass on that seam only.
Common mistakes
- Too hot too fast: warped pegboard or beads that smear.
- No paper: plastic sticks to the iron plate.
- Uneven bead height: one color brand slightly taller—press gently, do not scrape.
Field notes from real builds
Ironing notes from the same 58×72 portrait grid described in our photo-to-beads field test—two midi pegboards tall, Perler palette, household iron on a glass cutting mat. Your iron and board may differ; treat timings as starting points.
Board 1: first fuse pass
Dry iron, cotton setting (roughly medium), no steam. Parchment sheet over the face, slow circles for about 22 seconds until peg holes looked halfway closed. Lifting too early left visible rings; we added five more seconds rather than cranking heat.
The pegboard bowed slightly while hot—normal on older boards. We set it flat on the counter, parchment still on top, and weighted with a hardcover book for four minutes. That removed the curl without smearing beads.
Board 2 and the seam
Board 2 used the same timing. To join sections for display (not one giant fuse), we ironed each board separately, released warm, then aligned by eye using the PDF board edges as reference. A light edge pass on the shared row—only eight seconds—bonded neighbor beads without flattening the whole face again.
Slight color shift at the seam came from lighting in the photo, not from ironing. We touched two cells manually before the edge pass so the hair line did not step between boards.
Standard melt vs flat melt on the same project
For wall display we kept a standard melt on the face (holes partly visible). A spare scrap heart from the same session got a full flat melt—flip, second parchment pass, book weight—to simulate a keychain finish. Flat melt took longer and used more heat; the piece felt sturdier in a pocket but lost the classic bead texture up close.
Crafting mode and pauses
In the pattern maker, crafting mode marked placed cells while beads went on. We paused at roughly 60% with the board covered by a second pegboard flipped upside down to keep dust off. Progress stayed in the browser; ironing happened only after both boards were full.
If you iron mid-build, beads near the edge can slip when the board flexes—finish placement per section, then fuse. Multi-board PDF numbering matched the order we ironed: top board first, bottom second, seam last.
What we would do differently
- Preheat the iron fully before the first pass—cold starts caused uneven melt on board 1 the first time we tried.
- Keep a spare parchment sheet; the first one wrinkled and left a faint line until we swapped it.
- For gifts meant to hang flat, plan the book weight step before the recipient sees a curl.
After ironing
Trim threads, attach key rings, or felt backing for coasters. Share a Pinterest preview from the maker if you want to document the finished piece—exports include a site watermark on free previews.